If there’s one smell that can make anyone instantly hungry, it’s the aroma of fresh garlic bread baking in the oven. It’s warm, nostalgic, and powerful – the kind of scent that fills your home and draws people straight to the kitchen.
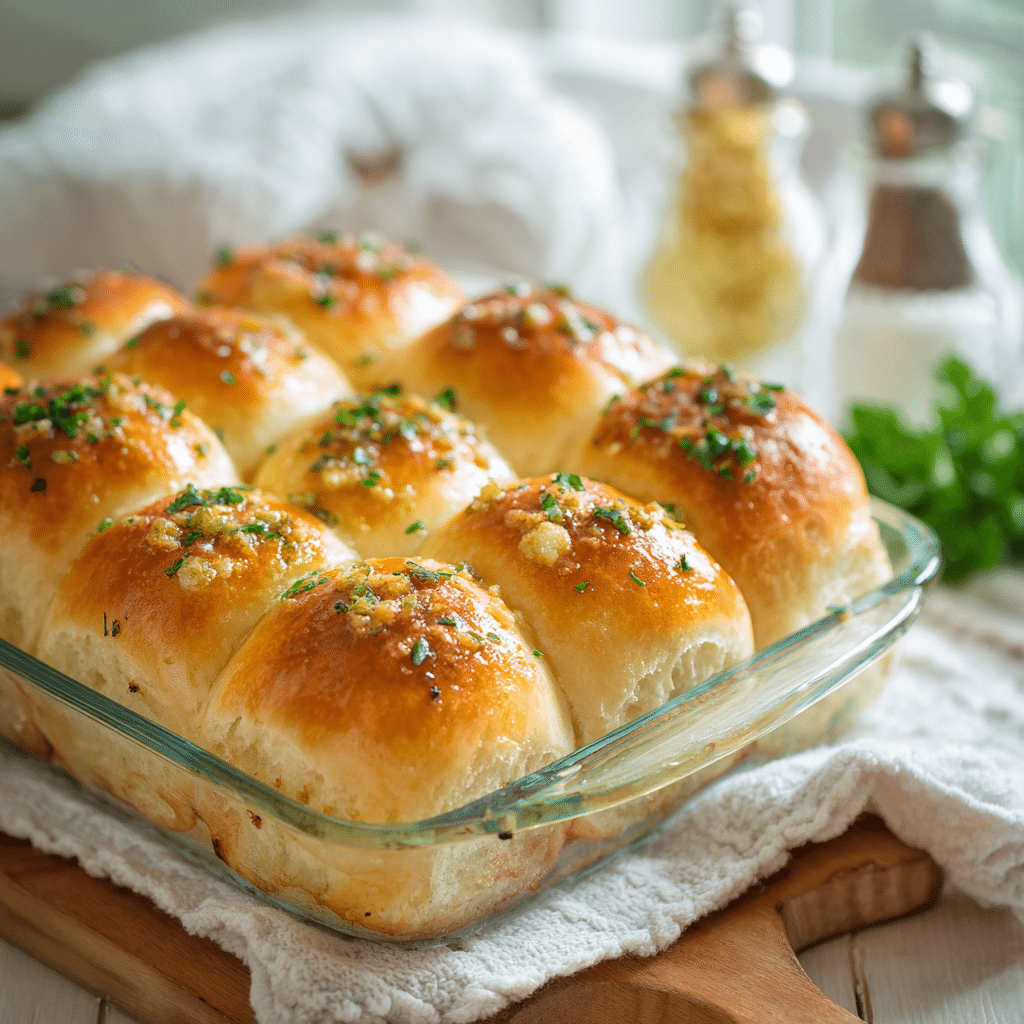
These garlic bread rolls are soft, fluffy, and brushed with a golden layer of buttery garlic herb glaze that soaks right into the crust. Every bite melts in your mouth. They’re the kind of dinner rolls that vanish before the main dish even hits the table – and once you’ve made them from scratch, it’s hard to go back to store-bought.
This recipe is designed for real kitchens and real people. No special tools. No complicated steps. Just simple ingredients, time, and a bit of patience that pays off in the best way possible.
Table of Contents
Table of Contents
The Magic Behind Homemade Garlic Rolls
When you bake bread from scratch, something special happens. It’s not just about the food – it’s about the process. The smell of yeast waking up, the soft dough stretching under your hands, the moment you peek into the oven and see them rising like clouds.
Bread has a way of slowing time down. And garlic? It makes that experience unforgettable.
These garlic dinner rolls combine both worlds – the coziness of homemade bread and the bold comfort of garlic butter. The texture is pillowy, the flavor is savory and slightly sweet, and the finish glistens with herbs that make each roll look straight out of a bakery window.
Why These Garlic Rolls Work Every Time
There are thousands of bread roll recipes online, but this one stands out for three reasons:
- Flavor inside and out. The garlic isn’t just brushed on top; it’s built into the dough itself. Every bite tastes like garlic, not just the first layer.
- A foolproof method. Even if you’ve never baked bread before, this step-by-step approach will guide you confidently.
- A perfect balance. Soft inside, golden outside, and rich with butter but never greasy.
And yes – they freeze beautifully and reheat like a dream.
Discover great ideas like our Quick & Easy recipes that combine healthy ingredients with clean seasonings like Garlic Bread Rolls.
Ingredients You’ll Need

You don’t need anything fancy. Most of these ingredients are already in your pantry.
For the Dough
- 3 cups (375g) all-purpose flour – the foundation of light, tender rolls.
- 2¼ tsp (7g) instant yeast – makes them rise high and airy.
- 2 tbsp sugar – wakes up the yeast and balances the savory flavor.
- 1 tsp salt – every good bread needs balance.
- ¾ cup (180ml) warm milk – adds moisture and tenderness.
- 2 tbsp melted unsalted butter – a touch of richness.
- 1 large egg – for structure and a soft crumb.
- 3 cloves garlic, finely minced – the unmistakable star.
For the Garlic Herb Butter
- ¼ cup (60g) unsalted butter, melted
- 2 cloves garlic, pressed or grated
- 1 tbsp fresh parsley, chopped
- 1 tsp Italian seasoning
- 1 pinch of salt
If you love garlic as much as I do, go ahead and add another clove. There’s no such thing as too much here.
Check out our refreshing Pineapple Coconut Ice Cream for a healthy dessert idea.
How to Make Garlic Bread Rolls (Step-by-Step)
1. Activate the Yeast
In a large bowl, whisk together warm milk, sugar, and yeast. Let it sit for 5–10 minutes until foamy. This step might seem simple, but it’s crucial – if your yeast doesn’t bubble, your rolls won’t rise.
Pro Tip: The milk should be warm to the touch, not hot. Think of it as a cozy bath for the yeast, not a scalding one.
2. Mix the Dough
Add melted butter, egg, minced garlic, and salt to the yeast mixture. Stir gently to combine. Slowly add the flour, one cup at a time, mixing until it forms a sticky dough.
At this point, switch to kneading. You can use a stand mixer with a dough hook, but your hands work just as well. Knead for 8–10 minutes until the dough feels smooth, elastic, and slightly tacky but no longer sticks to your fingers.

When the dough is ready, it will stretch easily without tearing – that’s the gluten telling you it’s done.
3. Let It Rise
Place the dough in a greased bowl, cover with plastic wrap or a clean towel, and let it rise for about 1 to 1½ hours. It should double in size.
This is the part where you trust the process. The yeast is quietly working magic, creating air pockets that make your rolls soft as clouds.
If your kitchen is cold, place the bowl in your oven with the light on – just the light, no heat. It creates a perfect warm environment.

4. Shape the Rolls
Punch down the dough gently to release the air. Divide it into 12 equal pieces – about 60g each if you’re precise. Roll each one into a smooth ball by tucking the edges underneath.
Place the rolls in a greased 9×13-inch baking dish, leaving a little space between them. They’ll expand as they rise again.

Cover the dish and let them rest for 30–40 minutes. They should puff up and nearly touch each other.
5. Bake to Golden Perfection
Preheat your oven to 375°F (190°C). Brush the tops of the rolls with a little melted butter for color, then bake for 18–22 minutes until they’re beautifully golden and fragrant.

The moment you open the oven, the scent will hit you – buttery, garlicky, and absolutely mouthwatering.
6. The Garlic Herb Finish
While the rolls bake, mix together melted butter, grated garlic, parsley, seasoning, and salt. As soon as the rolls come out, brush them generously with this warm garlic butter.
The butter melts and seeps into the crust, coating each roll with glossy, savory perfection.

If you want an extra indulgent finish, sprinkle the tops with a little grated Parmesan or flaky salt.
Don’t miss our Carrot Ribbon Salad – it’s a perfect light meal to enjoy alongside your Garlic Bread Rolls.

Irresistible Garlic Bread Rolls Recipe | Soft, Buttery & Full of Flavor
- Total Time: 2H
- Yield: 12 rolls 1x
Description
Soft homemade dinner rolls brushed with garlic herb butter.
Ingredients
For the Dough
3 cups (375g) all-purpose flour – the foundation of light, tender rolls.
2¼ tsp (7g) instant yeast – makes them rise high and airy.
2 tbsp sugar – wakes up the yeast and balances the savory flavor.
1 tsp salt – every good bread needs balance.
¾ cup (180ml) warm milk – adds moisture and tenderness.
2 tbsp melted unsalted butter – a touch of richness.
1 large egg – for structure and a soft crumb.
3 cloves garlic, finely minced – the unmistakable star.
For the Garlic Herb Butter
¼ cup (60g) unsalted butter, melted
2 cloves garlic, pressed or grated
1 tbsp fresh parsley, chopped
1 tsp Italian seasoning
1 pinch of salt
Instructions
Activate the Yeast
Mix the Dough
Let It Rise
Shape the Rolls
Bake to Golden Perfection
The Garlic Herb Finish
Notes
Use fresh garlic. Pre-minced garlic loses flavor quickly.
Don’t skip the rise. Rushing this step makes rolls dense.
Weigh your flour. Too much and your dough turns heavy.
Brush twice. Before baking for color, after baking for flavor.
Serve warm. The texture and aroma are best fresh from the oven.
- Prep Time: 20 Min
- Cook Time: 22 Min
- Category: Bread, Side Dish
- Cuisine: American / Comfort Food
Nutrition
- Serving Size: 12 rolls
- Calories: 185 kcal
- Sugar: 2 g
- Sodium: 170 mg
- Fat: 6.5 g
- Saturated Fat: 4 g
- Unsaturated Fat: 2.5 g
- Trans Fat: 0 g
- Carbohydrates: 26 g
- Fiber: 1 g
- Protein: 5 g
- Cholesterol: 35 mg
Tips for Bakery-Style Garlic Rolls
Baking bread is part science, part art. These tips ensure yours come out perfect every time:
- Use fresh garlic. Pre-minced garlic loses flavor quickly.
- Don’t skip the rise. Rushing this step makes rolls dense.
- Weigh your flour. Too much and your dough turns heavy.
- Brush twice. Before baking for color, after baking for flavor.
- Serve warm. The texture and aroma are best fresh from the oven.
If you have leftover garlic herb butter, drizzle it over roasted vegetables or use it to make garlic toast the next morning.

How to Store, Freeze, and Reheat
To store:
Keep cooled rolls in an airtight container at room temperature for up to 2 days. To reheat, wrap them in foil and warm in a 300°F (150°C) oven for 8–10 minutes.
To freeze:
After baking and cooling, freeze rolls in a zip-top bag for up to 2 months. Thaw overnight in the fridge, then reheat as above.
To make ahead:
Shape the rolls, place them in the baking pan, and cover. Refrigerate overnight. The next day, let them rest at room temperature until puffy, then bake as usual.
How to Serve Garlic Bread Rolls
These rolls belong on every table. Try them with:
- Creamy soups like tomato basil or potato leek
- Pasta dishes such as fettuccine Alfredo, bolognese, or lasagna
- Roasted meats and holiday dinners
- As mini sliders with leftover chicken or turkey
They also make incredible next-day snacks – just warm, split, and stuff with cheese or ham.
Discover great ideas like our Drinks & Dessert recipes for more ways to hydrate and nourish.
Troubleshooting: Common Questions
Can I make these without eggs?
Yes. Replace the egg with 3 tablespoons of milk or plant-based milk. The rolls will be slightly less rich, but still soft.
What if I only have active dry yeast?
No problem. Mix it with warm milk and sugar, then let it rest for 10–15 minutes before continuing. You’ll just need a little more rise time.
Can I use garlic powder instead of fresh garlic?
You can, but the flavor won’t be as vibrant. Use 1 teaspoon in the dough and ½ teaspoon in the butter mixture.
Why are my rolls dense?
Likely reasons include adding too much flour or cutting the rise time short. Bread rewards patience – always let it double before shaping.
Can I make them vegan?
Yes! Swap the butter for vegan butter and use a plant-based milk. The texture will stay soft and delicious.
Baker’s Reflection
Every baker remembers the first time they pulled homemade bread from the oven – that quiet pride when the crust crackles and you can’t resist tearing one open.
These garlic bread rolls give you that same feeling, every time. They’re simple enough for a weeknight, but beautiful enough for a holiday table. They remind you that comfort doesn’t need to be complicated.
Flour, yeast, milk, butter, garlic – five ordinary ingredients that come together to make something extraordinary.
And honestly, watching a tray of warm rolls disappear within minutes? That’s the best kind of compliment.
For more recipes follow me in Facebook and Pinterest
Final Thoughts
When you bake bread, you’re not just making food – you’re creating a memory. The smell lingers long after the meal, and so does the feeling.
These garlic dinner rolls are everything homemade bread should be: soft, flavorful, golden, and made with love. So roll up your sleeves, preheat the oven, and let your kitchen smell like comfort.
One tray of warm, buttery garlic rolls might not change the world, but for a few moments, it’ll make yours feel a little better.