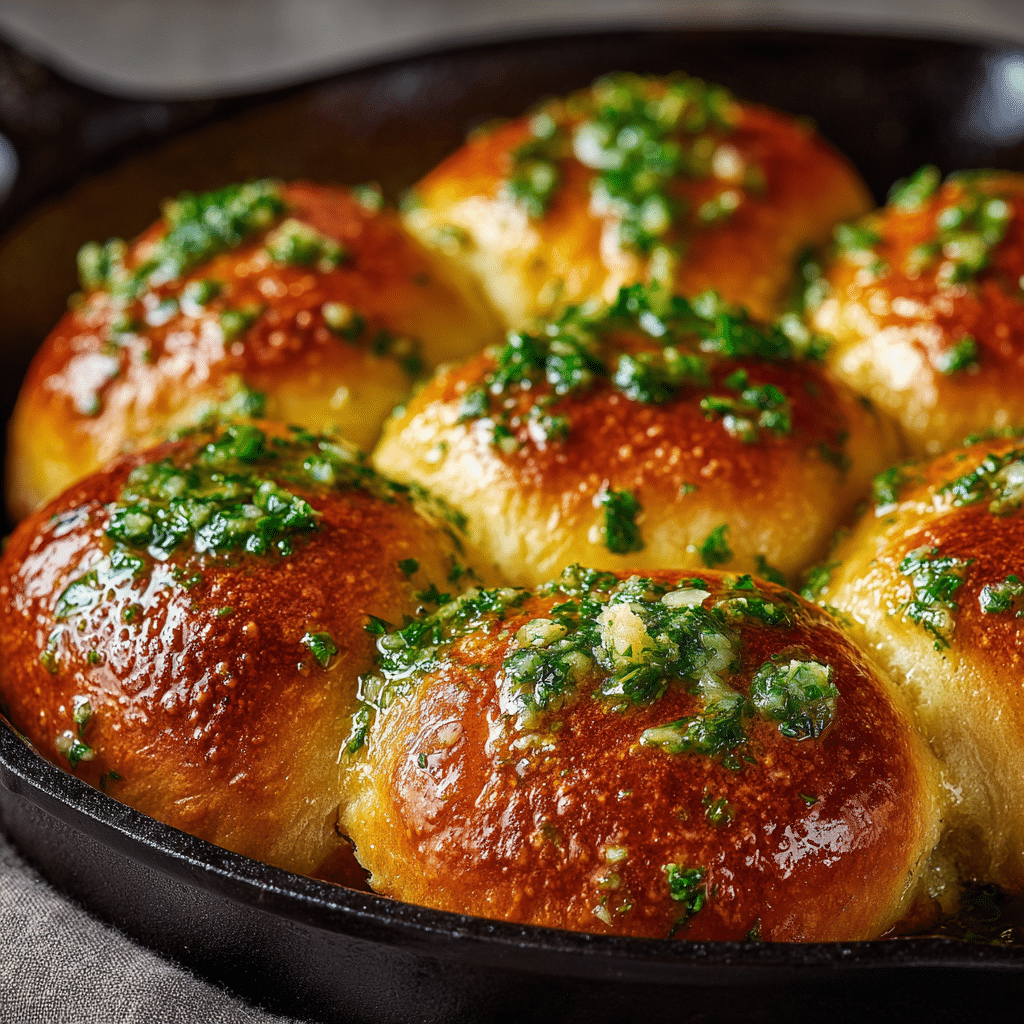
Soft, golden, and filled with rich buttery flavor, these Skillet Garlic Butter Dinner Rolls are the kind of recipe that food makers dream of. They’re pillowy on the inside, lightly crisp on the edges, and glazed with garlicky goodness that makes every bite irresistible.
If you’ve ever wanted to make homemade bread that’s easy yet impressive, this recipe is the one to keep. You don’t need fancy tools or bakery-level skills, just a skillet, a few simple ingredients, and a bit of patience while the magic of yeast does its work.
In this guide, we’ll go over everything you need to know to create the perfect batch of skillet rolls: from mixing and rising the dough to brushing on that final buttery finish.
Table of contents
Table of Contents
Why You’ll Love These Skillet Garlic Butter Dinner Rolls
There’s something deeply comforting about fresh bread baking in your kitchen. The aroma of garlic, butter, and warm dough makes any day feel special. But beyond their irresistible smell, here’s why these rolls are such a hit among food makers:
- Simple ingredients, big flavor: Every ingredient is basic pantry material, yet together they create bakery-level taste.
- One-pan convenience: Using a skillet not only gives your rolls a beautiful golden crust but also simplifies cleanup.
- Perfect for any meal: These rolls pair perfectly with soups, pastas, and grilled meats or can be enjoyed solo with extra melted butter.
- Fail-proof method: Even if it’s your first time baking bread, this guide walks you through each step clearly so you can bake with confidence.
Ingredients You’ll Need
For the dough
- 3 cups all-purpose flour (plus more for kneading)
- 2¼ teaspoons instant yeast (or 1 packet)
- 2 tablespoons sugar
- 1 teaspoon salt
- ¾ cup warm milk (around 110°F)
- 2 tablespoons unsalted butter, melted
- 1 large egg
- 3 cloves garlic, finely minced
For the garlic butter glaze
- ¼ cup unsalted butter, melted
- 2 cloves garlic, minced or pressed
- 1 tablespoon fresh parsley, chopped
- ½ teaspoon Italian seasoning (optional)
- A pinch of salt
These ingredients are simple yet powerful. When they come together, they create the softest, fluffiest dinner rolls that carry a beautiful balance of butter and garlic.
Step-by-Step Instructions
1. Activate the Yeast

Start by combining the warm milk, sugar, and yeast in a large mixing bowl. Stir lightly and let it sit for about 5 to 10 minutes until it turns foamy. This step ensures your yeast is active and ready to help your rolls rise perfectly.
If nothing happens after 10 minutes, your yeast may be old or the milk too hot or too cold. Try again with fresh yeast to avoid dense rolls later.
2. Mix the Dough

Add the melted butter, egg, minced garlic, and salt into the yeast mixture. Stir to combine. Gradually add flour, about a cup at a time, mixing with a wooden spoon or dough hook until a soft dough forms.
The dough should be slightly sticky but manageable. If it feels too wet, sprinkle in a bit more flour a tablespoon at a time.
Once mixed, knead the dough by hand on a lightly floured surface for 8 to 10 minutes or use a stand mixer with a dough hook for about 6 minutes. You’re looking for a smooth, elastic dough that bounces back when pressed gently.
3. First Rise

Place the dough in a lightly greased bowl and cover it with plastic wrap or a clean kitchen towel. Let it rest in a warm spot until doubled in size, which usually takes about an hour.
Pro tip: If your kitchen is cold, you can place the bowl in an oven that’s been turned off but slightly warmed for just a minute.
4. Shape the Rolls
Once the dough has doubled, punch it down gently to release air bubbles. Divide it into 12 equal pieces, each about 2 inches wide. Roll each piece into a smooth ball by tucking the edges under.
Grease a 10-inch oven-safe skillet and arrange the balls in a circular pattern, leaving a little space between each one. Cover again and let the rolls rise for another 30 to 40 minutes, or until they look puffy and soft.
5. Bake the Rolls

Preheat your oven to 375°F (190°C). Place the skillet on the center rack and bake for 18 to 22 minutes until the tops turn golden brown and the rolls feel firm on top but soft inside.
6. Make the Garlic Butter Glaze
While the rolls are baking, prepare the glaze. Combine the melted butter, minced garlic, parsley, Italian seasoning, and a pinch of salt in a small bowl. Stir well to mix.

7. Brush and Serve
As soon as the skillet comes out of the oven, brush the warm rolls generously with your garlic butter mixture. The hot bread will absorb the flavor instantly, creating that signature buttery shine and aroma.
Let them rest for 5 minutes before serving. Then tear one apart, inhale that heavenly scent, and take the first bite.

If you can’t get enough of buttery garlic flavors, you’ll love our Cheesy Garlic Butter Pull Apart Bread. It’s gooey, golden, and perfect for sharing right out of the oven. Try it the next time you want a crowd-pleasing side to your skillet dinner rolls.
PrintSkillet Garlic Butter Dinner Rolls
- Total Time: 1 hour 30 minutes
- Yield: 12 rolls 1x
- Diet: Vegetarian
Description
Bake soft, buttery Skillet Garlic Butter Dinner Rolls in one pan. Easy recipe for food makers with step-by-step photos and perfect golden crust results.
Ingredients
For the dough
3 cups all-purpose flour (plus more for kneading)
2¼ teaspoons instant yeast (or 1 packet)
2 tablespoons sugar
1 teaspoon salt
¾ cup warm milk (around 110°F)
2 tablespoons unsalted butter, melted
1 large egg
3 cloves garlic, finely minced
For the garlic butter glaze
¼ cup unsalted butter, melted
2 cloves garlic, minced or pressed
1 tablespoon fresh parsley, chopped
½ teaspoon Italian seasoning (optional)
A pinch of salt
Instructions
Step 1 : Activate the Yeast
Step 2 : Mix the Dough
Step 3 : First Rise
Step 4 : Shape the Rolls
Step 5 : Bake the Rolls
Step 6 : Make the Garlic Butter Glaze
Step 7 : Brush and Serve
Notes
Check your yeast
Don’t rush the rise
Avoid excess flour
Use an oven-safe skillet
Add flavor twists
- Prep Time: 20 minutes
- Cook Time: 20 minutes
- Category: Bread, Side Dish, Baking
- Method: Baked in Skillet, Homemade
- Cuisine: American, Comfort Food
Nutrition
- Serving Size: 1 roll (about 60 g)
- Calories: 185 kcal
- Sugar: 3 g
- Sodium: 210 mg
- Fat: 7 g
- Saturated Fat: 4 g
- Unsaturated Fat: 2.5 g
- Trans Fat: 0 g
- Carbohydrates: 25 g
- Fiber: 1 g
- Protein: 4 g
- Cholesterol: 20 mg
Tips for Perfect Skillet Garlic Butter Dinner Rolls
Even though this recipe is simple, these expert tips will help you master the process:
- Check your yeast: Always test your yeast’s freshness before starting. If it doesn’t foam up during activation, start over.
- Don’t rush the rise: Allowing the dough to double in size is crucial for light, fluffy rolls.
- Avoid excess flour: Too much flour can make your rolls dense. The dough should feel soft and slightly sticky, not dry.
- Use an oven-safe skillet: A cast-iron or heavy stainless steel skillet distributes heat evenly and helps create that golden crust.
- Add flavor twists: Try adding grated Parmesan or a sprinkle of cheddar before baking for an extra cheesy finish.
For another twist on homemade bread, check out our Garlic Bread Rolls Recipe. It uses the same rich butter-garlic base but turns every bite into a soft, flavorful roll that’s ideal for quick family dinners or meal prepping.
Serving Ideas
These Skillet Garlic Butter Dinner Rolls are so versatile that you can serve them with almost anything. Here are some favorite pairings that food makers love:
- With soup: They soak up creamy soups like potato leek or tomato basil beautifully.
- With pasta: Garlic bread and pasta are made for each other. Try these rolls with spaghetti carbonara or lasagna.
- With roast dinners: Perfect next to roasted chicken, turkey, or beef.
- For sliders: Slice them in half and fill with pulled pork, roast beef, or grilled veggies for bite-sized sandwiches.
They’re even great for breakfast with scrambled eggs or as a quick snack dipped in olive oil and balsamic vinegar.
After your rolls are out of the oven, cool things down with something sweet and tropical. Our Pineapple Coconut Ice Cream is creamy, refreshing, and balances the savory richness of garlic butter with light, fruity freshness.
Make-Ahead and Storage
These rolls are perfect for prepping ahead or freezing for later. Here’s how:
- To store: Once the rolls are cool, place them in an airtight container and keep them at room temperature for up to 2 days.
- To freeze: Allow the baked rolls to cool completely, then freeze in a sealed freezer bag for up to 2 months. Reheat in the oven at 300°F for 10 minutes before serving.
- To prepare ahead: Shape the rolls and place them in the skillet. Cover with plastic wrap and refrigerate overnight. Let them sit at room temperature for about 45 minutes the next day before baking.
Variations to Try
- Cheesy Garlic Rolls: Add shredded mozzarella or Parmesan to the dough before shaping.
- Herb Butter Rolls: Mix rosemary, thyme, or dill into the butter glaze for a fresh herbal twist.
- Spicy Garlic Rolls: Stir a pinch of red pepper flakes into the garlic butter for a mild heat.
- Sweet Garlic Honey Rolls: Drizzle a little honey into the butter mixture for a sweet-savory flavor balance.
Each variation gives a unique take while keeping the same soft texture and aromatic appeal.
Want more meal ideas to serve with your rolls? Explore our full Main Dishes collection for easy recipes that pair perfectly with bread sides — from hearty roasted meats to simple weeknight pastas.
Common Mistakes to Avoid
- Overbaking: Check your rolls at the 18-minute mark. If they get too brown, they’ll lose their soft texture.
- Cold ingredients: Cold milk or butter can slow down yeast activity. Always use warm (not hot) ingredients.
- Skipping the second rise: This step helps the rolls become airy and tender. Never skip it.
- Adding too much garlic: Garlic flavor intensifies as it bakes, so measure it carefully to avoid bitterness.
Nutrition Overview (Approx. per roll)
Calories: 185
Fat: 7g
Carbohydrates: 25g
Protein: 4g
Sugar: 3g
Fiber: 1g
This nutritional estimate may vary depending on the butter or flour you use, but it gives you a general idea of what’s in each delicious roll.
Food makers appreciate recipes that balance simplicity with great results. Skillet baking offers both. The even heat of a skillet ensures consistent results, and the presentation is rustic yet charming. Whether you’re running a food blog or baking for a family dinner, skillet rolls photograph beautifully and serve effortlessly straight from the pan.
The skillet method also helps retain moisture better than baking on open trays. This keeps the rolls fluffy and tender longer, even after cooling.
FAQs About Skillet Garlic Butter Dinner Rolls
Can I use active dry yeast instead of instant yeast?
Yes, you can. Just dissolve it in the warm milk and sugar mixture and wait about 10 to 15 minutes until it foams before continuing with the recipe.
Can I use whole wheat flour?
You can substitute half of the all-purpose flour with whole wheat flour. Keep in mind, the rolls will be a bit denser but still flavorful.
Do I have to use a skillet?
No, you can bake the rolls in any oven-safe round or square pan. However, the skillet gives the best crust and presentation.
Can I add cheese on top before baking?
Absolutely. Shredded mozzarella or Parmesan will create a beautiful, savory crust that complements the garlic butter glaze perfectly.
For more recipes follow me in Facebook and Pinterest
Final Thoughts
The beauty of Skillet Garlic Butter Dinner Rolls lies in their simplicity. They prove that homemade bread doesn’t need to be complicated to be special. With just a handful of pantry staples and a little patience, you can create something that feels luxurious and homemade at the same time.
The next time you want to impress guests or treat yourself to a little comfort, grab your skillet and bake these rolls. They’ll fill your kitchen with warmth and your table with smiles.